WebUI Classic Pages
This section describes various tasks related to WebUI classic pages.
Adding a Page
To add a new root page to your AIMMS WebUI:
Press the ‘hamburger’ icon
 on the top left position of your browser window. A page tree sidebar will open.
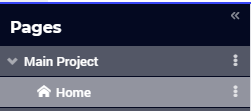
By default, one page is available, called ‘Home’, located in the ‘Main Project’.
Press the plus button behind ‘Main Project’.
Specify a name for your new page and press the Enter key to add the new page to the list of available pages. Press the Escape key if you want to cancel the creation of the new page.
To add a new subpage to your AIMMS WebUI:
Press the ‘hamburger’ icon
on the top left position of your browser window.Press ‘dots’ button
 behind the parent page of your new subpage.
A list of page control buttons appears. Press the button for adding a subpage:

Specify a name for your new subpage and press the Enter key to add the new subpage to the list of available pages. Press Escape if you want to cancel the creation of the new subpage.
Tip
When entering the new name, a red line around the name input field can appear, meaning that the current name will not be accepted. E.g. when a page name already exists at this level in the page tree.
To navigate to the newly created page, press the page in the list of available pages in the Page Manager or in the Page Menu.
After adding a page, you can add widgets to it.
Important
There are some changes made to the page manager with the introduction of Side Panels from software version 4.64. The changes are explained in adding a side panel page.
Renaming a Page
To rename a page in your AIMMS WebUI:
Press the ‘hamburger’ icon
on the top left position of your browser window. A page tree sidebar will open.Press the ‘dots’ button
behind the page that you want to rename.A list of page control buttons appears. Press the pencil button
 for renaming the page:
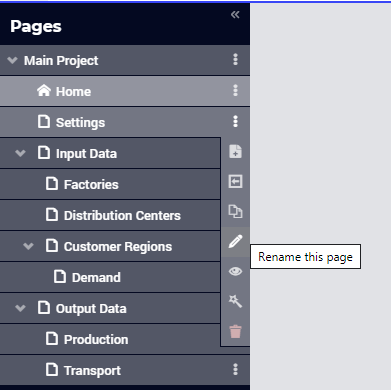
Specify a name for your new page and press the Enter key to commit the new page name. Press the Escape key if you want to cancel renaming the page.
Tip
When entering the new name, a red line around the name input field can appear, meaning that the current name will not be accepted. E.g. when a page name already exists at this level in the page tree.
Moving a Page
To move a page to a new position in your page tree you can perform a drag-and-drop operation as follows:
Press the ‘hamburger’ icon
on the top left position of your browser window. A page tree sidebar will open: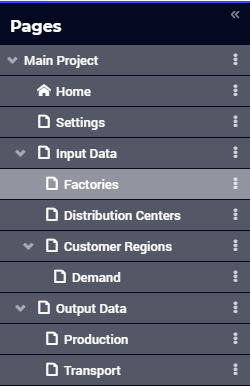
Click on the page that you want to move and hold your mouse button down.
Move your mouse to the new position in the tree. Subtrees will automatically expand when hovering over them. A little triangle will indicate the new position of your page. If the triangle is on top of another page name, your page will end up just above this page. If it is at the bottom of another page name, your page will end up just below this page. If it is in the middle, your page will become a subpage of the other page.
Release your mouse button to perform the move to the new position.
Changing the Visibility of a Page
By default, all pages in your page tree are visible for all users of your WebUI app. However, sometimes you may want to hide certain pages. E.g. when they should only be visible for certain users of your WebUI app, or only after certain actions are performed. In such cases, you can change the visibility of a page in the following way:
Press the ‘hamburger’ icon
on the top left position of your browser window. A page tree sidebar will open.Press the ‘dots’ button
behind the page for which you want to change the visibility.A list of page control buttons appears. Press the eye button
 to open the visibility option for the page:
Specify a value for the visibility option and press the Enter key to commit it.
Possible values are ‘true’ or 1 (visible), ‘false’ or 0 (hidden), or an AIMMS identifier that contains one of these values.
By specifying an AIMMS identifier for the visibility option of a page, you can dynamically control from within the AIMMS model, which pages should be visible on a certain moment.
When a page is hidden, it will not show up in the Page Menu. In the Page Manager, hidden pages are ‘grayed out’ and they have a ‘hidden’ icon  behind their name.
Deleting a Page
To delete a page:
Press the ‘hamburger’ icon
on the top left position of your browser window. A page tree sidebar will open.Press the ‘dots’ button
behind the page that you wish to delete.A list of page control buttons appears. Press the bin button
 to delete the page:
Setting the Home Page
In the Page Manager, the first page in the Main Project has a home icon  . This means that when opening your WebUI app (in develop mode or in PRO) you are automatically being navigated to this first page.

By default, there is one page in your WebUI app called home. This is the first page and thus the ‘startup’ page. However, as an app developer you can make another page the startup page if you want, by moving another page to the first position. This automatically makes this page the new startup page. Of course, if you just want to give the default home page another name, you can do so by renaming the page.
Wizards (DEPRECATED)
Important
The Wizard is deprecated. Please use the Workflow Panel that has a more rich and fine grained experience.
In AIMMS WebUI it is possible to create so-called Wizards. A Wizard is a set of pages that an app user should follow in a certain order. On every page in a wizard, the user can click on Next or Previous,

or Start wizard/Finish wizard in case of the first/last page.

Example
To illustrate what a wizard could look like, let’s look at this example: Processing your shopping cart in a web shop. After having added some items to your shopping cart, you can access your Shopping Cart wizard. By clicking on it, you’ll get:
an overview of the items in your shopping cart that you can still change (start page), click ‘start wizard’,
an option to login or register as new user and provide the necessary information (page 2), click ‘next’,
fields to enter your contact information and delivery address (page 3), click ‘next’,
fields to specify how you want to pay (last page), click ‘finish’,
a confirmation page that provides some information about what will happen next (result page).
During this process, the user can cancel the process.
Such a shopping cart wizard will guide the user through a set of pages and it will make sure that all the necessary data is provided and handled in the way it should. E.g. no order is placed when the user is still unknown.
Create, Update or Delete a Wizard
To create, update or delete a wizard:
Press the ‘hamburger’ icon
on the top left position of your browser window.Press the ‘dots’ button
behind the page that should be the start page of your wizard.A list of page control buttons appears. Press the wizard button
 to create or update the wizard.
The Wizard editor will pop up similar to the one in the following picture:

After having made your changes, you can press the Create wizard/Update wizard button at the bottom of the Wizard editor. To delete a wizard, use the Delete wizard button at the top of the Wizard editor.
The Wizard editor allows you to select the pages that should be part of this wizard. If you want to select more than three pages, you can use the Add page to wizard button. For every page, you can specify a start and end procedure. You can move the pages up or down to change their order in the wizard. You can delete them from the wizard by using the little bin icon behind the page row in the Wizard editor.
Update list from page tree
In case all the pages for a certain wizard are subpages of the first wizard page, you can also change the order of the pages by using the Update list from page tree button. When you change the order of the pages in the page tree, this button allows you to easily apply these changes to the wizard page order as well.
Cancel procedure
In the Wizard editor, you can also specify a cancel procedure that will be run when the user presses the Cancel button when going through a wizard.
Result page
When the user presses the Finish wizard button on the last page of the wizard, the user will be directed to the Result page specified in the Wizard editor.
Procedures in a Wizard
A wizard contains a set of pages that the user should follow in a certain order. Each of these pages can have its own page procedure, which will always be run when the page is opened, also when the page is opened without using a wizard. Furthermore, when creating a wizard, the app developer can specify a start and end procedure for every page that is part of the wizard. These procedures are automatically run, only when the user is following the wizard (i.e.: when opening the same page(s) outside of the wizard, they will not be run). The exact order of execution of procedures for a wizard page is:
Start procedure
Page procedure
All the interactivity that the user can do on the wizard page followed by clicking ‘Start wizard’, ‘Next’, or ‘Finish wizard’
End procedure
Repeat step 1 for the next page in the wizard (or the ‘Result page’ in case of ‘Finish wizard’, see below)
When the user cancels the wizard, a Cancel procedure is called that can also be specified in the Wizard dialog. When the user finishes the wizard by pressing ‘Finish wizard’ on the last page, the user is directed to the ‘Result page’, which can also be specified in the Wizard dialog.
Arguments
The start/end/cancel procedures for pages in a wizard can have 2 arguments (this is optional):
Parameter statusCode {
    Property: Output;
}

StringParameter statusDescription {
    Property: Output;
}
Inside the procedures, the app developer can assign values to these arguments. E.g.
statusDescription := "You need to make a selection first.";
statusCode := webui::ReturnStatusCode('ERROR');
or
statusDescription := "OK.";
statusCode := webui::ReturnStatusCode('OK');
The statusCode value at the end of the end/cancel procedure will decide whether or not to continue. This means that in case the statusCode is not 200 (‘OK’), the user will remain on the current page. The WebUI will display the statusDescription string to provide the user with extra information. In case the statusCode is 200 (‘OK’), the user will continue to either the next page (in case of an end procedure) or the wizard will be canceled (in case of the cancel procedure). The statusDescription in such a case will only be displayed when it is not equal to “OK” or “”.